Swapping out a worn or damaged drill chuck can restore your tool’s precision in minutes. Many users feel intimidated by the task, but with the right approach it’s a straightforward mechanical fix. This guide covers everything from recognizing chuck types to safely installing a new one. You will gain the confidence to perform this repair on handheld drills and drill presses alike.
Understanding Your Drill Chuck Type
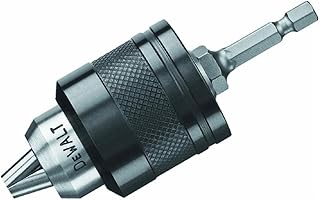
DEWALT Drill Chuck for Impact Driver, Quick Connect (DW0521)
Check PriceMost drills fall into two categories: keyed chucks that require a toothed key, and keyless models you tighten by hand. Identifying which you have will dictate the removal technique. Keyed chucks offer higher gripping torque and are common on heavy-duty and drill press models. Keyless chucks provide faster bit changes and are often found on cordless drills.
The way the chuck mounts to the spindle also matters, with threaded (often 1/2-20 or 3/8-24) and Morse taper fitting being the most common. An incorrect assumption here can damage threads or the arbor. If you are unsure, check your drill’s manual or look up the chuck design specifications. Our choosing the right drill chuck guide also helps identify compatible replacements.
Essential Tools for Changing a Drill Chuck
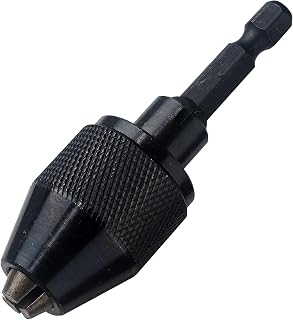
NEIKO 20753A Keyless Drill Chuck for Impact Driver, Chuck Conversion Adapter
Check PriceGather a few basics before you start: a matching chuck key (if applicable), a set of Allen wrenches, a flat-head screwdriver, and a rubber mallet. For threaded chucks, you might also need a strap wrench to get a firm grip without marring the surface. A small brush to clean threads and a dab of medium-strength thread locker will ensure a secure fit after installation.
Tools for Keyed Chucks
Keyed chucks have a left-hand threaded retaining screw inside the chuck body that must be removed first. Use a Phillips or flat-head screwdriver that fits snugly. The screw is reverse-threaded, so turn it clockwise to loosen. Keeping the correct key nearby allows you to test the new chuck once installed.
How to Remove a Keyed Drill Chuck
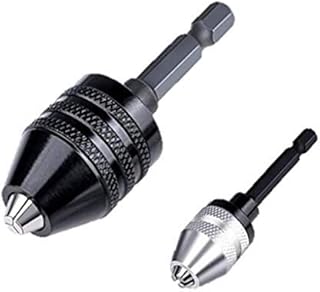
aiyun Mini Drill Chuck Adapter Impact Driver Keyless (0.6-8mm)
Check PriceStart by opening the jaws fully and locating the retaining screw deep inside. Using a screwdriver, turn the screw clockwise (reverse thread) until it’s completely removed. Next, insert the chuck key and give it a sharp counterclockwise tap with a mallet to break the thread lock. You can now unscrew the chuck by hand or with help from a strap wrench.
When the Chuck Won’t Budge
If the chuck is seized, apply a penetrating oil around the spindle junction and let it sit for ten minutes. Sometimes clamping the shorter end of a large Allen wrench in the chuck and striking the long arm with a mallet provides extra leverage. Protect the drill’s gearbox by bracing the motor housing against a workbench, and always wear safety glasses during this step.
How to Remove a Keyless Drill Chuck
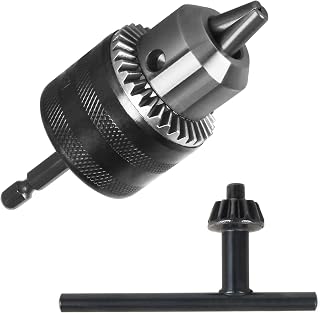
Drill Chuck 3/8 inch for Impact Driver, 1/4″ Hex Shank Quick Connect Keyless
Check PriceKeyless chucks typically have a retaining screw identical to keyed models, so open the jaws and remove it first. After the screw is out, tighten the chuck onto a large Allen key (often 10 mm or 3/8 inch) clamped in a vise. Run the drill in reverse while holding the chuck body; a few quick trigger pulls usually spin the chuck right off the spindle.
Some keyless designs use a two-piece locking collar that requires a pin spanner wrench. In that case, hold the lower collar with the spanner while rotating the upper part counterclockwise. This technique prevents damage to the chuck’s grip mechanism and keeps the drill’s motor from stalling. Double-check your drill’s schematic if you see multiple slots on the collar.
Installing a New Drill Chuck: Step-by-Step
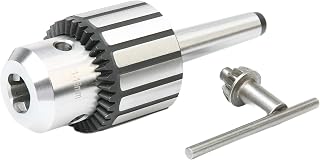
5/8-Inch Keyed Heavy Duty Drill Chuck with #2MT Taper Arbor
Check PriceBefore mounting the new chuck, clean the spindle threads with a wire brush and wipe them dry. Apply a single drop of thread locker to the threads if recommended by the manufacturer. Hand-thread the chuck onto the spindle clockwise until it’s snug, then seat it firmly with a quick, controlled spin of the drill. Secure the retaining screw by turning it counterclockwise into place.
If you are installing a Morse taper chuck, the process is even simpler. Slide the chuck onto the clean arbor and give the nose a firm tap with a soft-faced mallet. Do not use metal hammers directly on the chuck, as that can distort the jaws. Test alignment by chucking a straight bit and spinning the drill; any wobble means the seat needs to be re-seated.
Changing a Drill Chuck on an Impact Driver
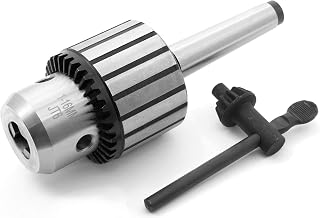
WEN LA164K 5/8-Inch Keyed Drill Chuck with MT2 Arbor Taper
Check PriceImpact drivers normally accept hex-shank bits, so you need a dedicated conversion chuck with a 1/4-inch quick-connect base. These chucks slip into the driver’s collet just like any standard bit. Removal is as easy as pulling the collet ring and sliding the chuck out. They are ideal for occasional drilling when you don’t want to carry a separate drill.
When shopping for an impact-ready chuck, look for models rated for high RPM and impact forces. The extra vibration can loosen a standard chuck, so many conversion chucks include a set screw to lock onto the hex shaft. Check the product description carefully, because not all keyless chucks are designed to handle the hammering action of impact drivers.
Removing a Stuck or Jammed Drill Chuck
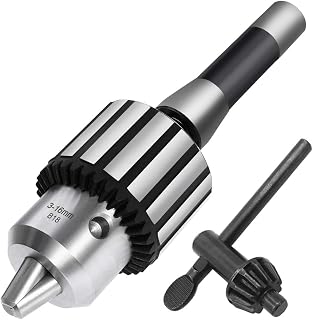
Earl Diamond Super Heavy Duty Drill Chuck 5/8″ Capacity with R8 Shank
Check PriceA stuck chuck often results from rust, overtightening, or a damaged retaining screw. After applying penetrating oil, try using a heat gun on the chuck body to expand the metal slightly. Be cautious not to overheat the spindle bearings, and focus heat only on the chuck for about 30 seconds. The combination of heat and oil almost always breaks the bond.
If the retaining screw head is stripped, use a left-hand drill bit to back it out slowly. Place the drill in a vise with padded jaws and drill through the screw center. The reverse action of the bit will eventually grab and spin the screw free. Replace the screw with a new one before mounting the new chuck to avoid the same headache later.
How to Replace a Drill Chuck on a Drill Press
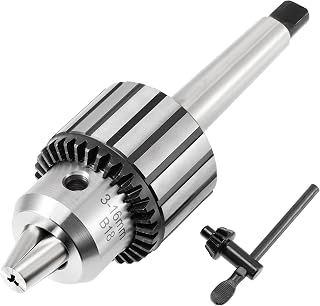
MT2 Drill Chuck 5/8″ with Tang Arbor, Heavy Duty Keyed
Check PriceDrill presses mostly use Morse taper mounts that can be removed by inserting a special drift key through the slot in the quill. Lower the quill until the slot aligns, push the drift into the opening, and tap sharply with a hammer. The chuck and arbor will drop out together. Protect the table with a piece of wood to catch the falling assembly.
To install the new taper chuck, simply clean both mating surfaces and press the chuck onto the arbor by hand. A firm push combined with a light tap from a rubber mallet seats it securely. Test runout with a dial indicator if precision work is critical. Never rely on the drill press’s power to seat a taper, you risk damaging the quill or chuck jaws.
Keyed vs. Keyless Chuck: Which One Should You Choose?
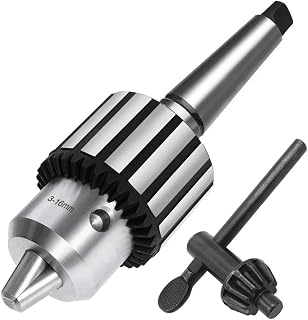
Earl Diamond Super Heavy Duty 5/8″ Drill Chuck with MT2 Shank & K32 Key
Check PriceKeyed chucks deliver greater clamping force, making them ideal for large diameter bits and tough materials like steel. They require a dedicated key that can be lost, but the three point engagement prevents slippage under heavy loads. If you frequently drill metal or use a drill press, a keyed chuck is the safer, more durable choice. The positive lock also helps maintain concentricity.
Keyless chucks trade some raw torque for speed and convenience. You can swap bits in seconds without reaching for a key, which boosts productivity on jobs with many bit changes. Modern keyless designs with carbide gripping teeth minimize slip. For woodworking, light metalwork, and cordless drills, a high-quality keyless chuck offers a balanced mix of performance and ease of use.
Common Mistakes to Avoid When Changing a Drill Chuck
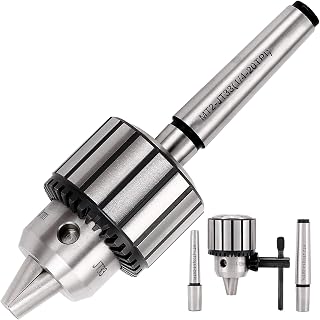
KingTool 4-Piece 1/2-Inch Drill Chuck Set with Key and Morse Taper Arbors
Check PriceForcing a chuck onto mismatched threads is the number one reason for spindle damage. Always verify the thread pitch and diameter, 1/2-20 and 3/8-24 are not interchangeable. Overtightening the retaining screw can strip the internal threads, so stop as soon as it seats. Skipping the cleaning step leaves grit that causes future runout and wobble.
Using a hammer on the chuck body without a soft face distorts the jaws and ruins concentricity. Similarly, never use pliers directly on the chuck exterior, scratches become stress risers. If the drill has a spindle lock, engage it before twisting the chuck to avoid gearbox damage. Take your time, and double check each step to prevent costly mistakes.
Maintaining Your Drill Chuck for Longevity
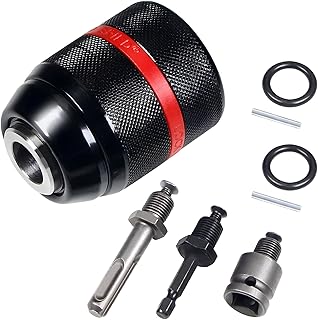
Keyless Drill Chuck for Milwaukee, 1/2-20UNF 1.5-13mm Self-Tightening
Check PriceRegular maintenance extends chuck life dramatically. After every heavy use, blow compressed air through the jaws to remove dust and metal chips. A drop of light machine oil on the jaw slides keeps them moving smoothly. For keyless chucks, wiping the grip sleeve with a clean cloth restores the tactile feel and prevents slippage during tightening.
Always insert drill bits fully into the chuck and tighten evenly at all three points. Off-center clamping wears the jaws unevenly and creates runout that affects hole accuracy. If you combine proper technique with proper drill bit selection, your chuck will hold tight for years. A well-cared-for chuck also reduces vibration transferred to your hands.
Upgrading Your Drill Chuck: Features to Look For
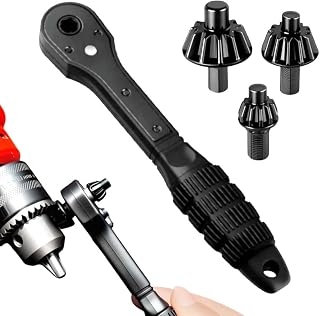
3 in 1 Drill Chuck Ratchet Spanner, 2025 New Universal Chuck Key Replacement Tool
Check PriceWhen shopping for a replacement, check the maximum capacity and the mounting type first. An all-metal construction with hardened steel jaws outlasts plastic-collared alternatives. Look for chucks with anti-slip carbide inserts if you work with large diameter bits frequently. A chuck that includes an automatic spindle lock feature lets you change bits with one hand.
Consider future projects: a 5/8-inch capacity chuck offers more versatility than a standard 3/8-inch model. Brands with a reputation for precision engineering, like those listed throughout this guide, typically provide better runout tolerances. Investing in a premium chuck now saves you from repeating the replacement process again soon and improves the overall performance of your drill.
Frequently Asked Questions About Drill Chucks
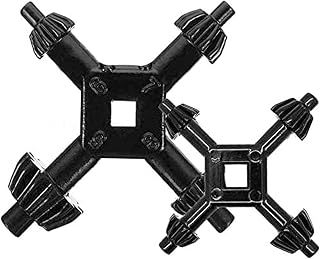
Thaekuns 2-Pack 4 in 1 Drill Chuck Key Set
Check PriceCan I use an impact driver chuck on a regular drill?
Yes, as long as the chuck has a standard 1/4-inch hex shank, it will fit a regular drill’s keyless chuck. However, the added length may exaggerate minor runout. For precise work, mount a traditional threaded chuck directly onto the drill spindle to keep the assembly as short and rigid as possible.
How do I know if my chuck is a threaded or taper mount?
Look inside the open chuck: if you see a screw in the center, it’s a threaded mount. If the chuck has no screw and can be removed with a wedge-shaped drift inserted through a slot, it’s a Morse taper. When in doubt, consult the owner’s manual or measure the spindle mount with calipers to confirm the exact style.
Why does my new chuck wobble?
Wobble often comes from debris or burrs on the spindle threads or taper seating surfaces. Remove the chuck, clean thoroughly, and reinstall. If runout persists, test with a different bit to rule out bent accessories. A quality chuck should exhibit less than 0.003 inches of runout; anything higher may indicate a manufacturing defect or a bent spindle.
Conclusion:
Changing a drill chuck is a reliable do-it-yourself task that sharpens your tool’s accuracy and extends its useful life. With the right identification, tools, and patience, you can complete the swap in under 15 minutes. Refer back to this tutorial whenever you start a replacement, and always prioritize safety and proper fitment for the best results.
Disclosure: As an Amazon Associate, we earn from qualifying purchases at no extra cost to you. Our posts are created with AI tools and human editing.