
Porcelain tile, renowned for its incredible durability and aesthetic appeal, presents a unique challenge when it comes to drilling. Its exceptional hardness, low porosity, and dense composition mean that standard drill bits simply won’t cut it. To avoid cracked tiles, costly mistakes, and endless frustration, choosing the best drill bit for porcelain tile is paramount. This comprehensive guide will delve into the types of drill bits designed for this tough material, discuss essential drilling techniques, and provide valuable safety tips to ensure your project is a success.
Understanding Porcelain Tile and Why it’s So Difficult to Drill
Before we explore the ideal tools, it’s helpful to understand what makes porcelain tile so resistant to drilling. Porcelain is a type of ceramic tile, but it’s fired at much higher temperatures and made from a finer, purer clay. This results in a tile that is:
- Extremely Hard: Porcelain has a high Mohs hardness rating, making it more resistant to scratches and abrasion than most other tile types. This same hardness makes it incredibly difficult to penetrate with conventional drill bits.
- Very Dense: The high firing temperature reduces the porosity of porcelain to less than 0.5%, making it nearly impervious to water. This density also contributes to its brittle nature, meaning it can crack or chip easily if not drilled correctly.
- Brittle: Despite its strength, porcelain is also brittle. It doesn’t flex, so improper drilling techniques or the wrong drill bit can quickly lead to spiderweb cracks or large chips.
Given these characteristics, the key to successful drilling lies in using a drill bit that can abrade or grind away the material rather than attempting to cut it, and employing techniques that minimize heat and vibration.
The Best Drill Bit for Porcelain Tile: Diamond-Tipped Bits
Without a doubt, the diamond-tipped drill bit is the gold standard and the overwhelmingly recommended choice for drilling into porcelain tile. Why diamonds? They are the hardest natural material on Earth, making them uniquely capable of grinding through the incredibly tough surface of porcelain.
How Diamond Drill Bits Work
Diamond bits don’t cut in the traditional sense; instead, they abrade the material. Tiny industrial diamonds are embedded into the tip or rim of the drill bit. As the bit rotates, these diamonds essentially grind away the porcelain, creating a clean, precise hole.
Types of Diamond Drill Bits for Porcelain Tile
There: are generally two main types of diamond-tipped drill bits for porcelain:
- Wet Diamond Drill Bits (Water-Cooled):
- Mechanism: These bits require continuous water lubrication during drilling. They often have a hollow core to allow water to flow through and cool the diamond tip.
- Advantages: Excellent for longevity of the bit and preventing overheating of both the bit and the tile. They produce less dust and are ideal for extensive drilling or professional use.
- Disadvantages: Requires a water supply (either a spray bottle, wet sponge, or specialized water-feed system), which can be messy.
- Best for: Projects with multiple holes, larger holes, or when maximum bit lifespan is desired.
- Dry Diamond Drill Bits (Wax-Filled):
- Mechanism: These bits come with a wax insert in their core. As the bit heats up during drilling, the wax melts, lubricating and cooling the diamond tip from within.
- Advantages: Convenient as no external water source is needed, reducing mess. They are quick and efficient for smaller jobs or fewer holes.
- Disadvantages: The wax eventually depletes. While some bits can continue to function after the wax is gone, their lifespan will be reduced, and external cooling might become necessary.
- Best for: Quick, smaller jobs where setting up a water cooling system is inconvenient, or for occasional DIY use.
Key Features to Look for in Diamond Drill Bits
When selecting a diamond drill bit for your porcelain tile project, consider these features:
- Vacuum-Brazed Technology: This refers to the process by which the diamonds are bonded to the bit. Vacuum brazing creates a stronger, more durable bond, leading to a longer-lasting bit and more efficient drilling.
- Segmented Cutting Edge: Some diamond bits feature a segmented rim, which can improve irrigation and material evacuation, leading to faster drilling and better cooling.
- Shank Type: Ensure the shank (the part that fits into your drill chuck) is compatible with your drill. Hexagonal shanks are common for electric drills.
- Quality of Diamonds: While difficult to ascertain visually, reputable brands typically use higher-grade industrial diamonds, leading to better performance and longevity.
Top Rated Diamond Drill Bits for Porcelain Tile [Amazon Buyer’s Guide]
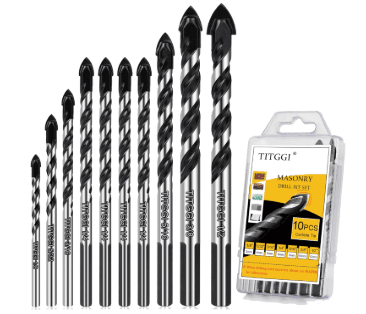
COMOWARE 10 Pc Masonry Drill Bits
- 10-piece carbide tip set
- Works on tile, brick, stone, glass
- 3-flat shank for better grip
- Affordable
- Sharp and efficient
- No case
Use on tile?
Yes
Reusable?
Yes, with care
Farhigh 6 Pcs Diamond Bits – Ceramic/Glass
- Diamond-coated tips
- Great for porcelain & marble
- Smooth, clean holes
- Precise cuts
- Long-lasting
- No size label on bits
Glass drilling?
Yes, cleanly
Used on metal?
No
DYRECELVE 12 Pc Masonry Set – Concrete & Tile
- Sizes 1/8″ to 1/2″
- Works on concrete, glass, tile
- Anti-slip shank design
- Wide size range
- Durable tips
- Case quality is average
Good for wall tile?
Yes
Compatible with all drills?
Yes
Bosch NS2004 4 Pc Carbide Set
- Carbide-tipped for longevity
- Clean holes in hard tile
- Assorted sizes
- Trusted brand
- Excellent for ceramic
- Pricey for 4 bits
Marble use?
Yes
Wobble issue?
No
DEWALT 1/4” Tile Drill Bit – Diamond Tip
- Diamond-coated 1/4” bit
- Best for ceramic & glass
- Fits standard drills
- Top-quality build
- Reliable performance
- Single bit only
Precise on glass?
Yes
Overheats fast?
Use with water cooling
A Viable Alternative: Carbide-Tipped Drill Bits (with Caveats)
While diamond bits are the top recommendation, carbide-tipped drill bits can sometimes be used for porcelain tile, particularly for smaller, less demanding tasks or if you already have them on hand. However, there are significant caveats:
- Tungsten Carbide Material: These bits feature a spear-point or multi-faceted tip made from tungsten carbide, a very hard metal.
- Performance on Porcelain: Carbide-tipped bits are typically designed for softer ceramic tiles. While they can, in some cases, penetrate porcelain, they will wear out much faster than diamond bits, generate more heat, and are more prone to chipping the tile or burning out their tip.
- Technique is Crucial: If using a carbide-tipped bit on porcelain, extremely slow speeds, light pressure, and constant cooling (with water) are absolutely essential to minimize the risk of damage and prolong the bit’s life.
- Not for Vitrified Porcelain: For very hard, vitrified porcelain, carbide bits are generally ineffective and will likely lead to frustration and damaged tiles.
Recommendation: For the best results and to avoid potential damage, it is highly recommended to invest in diamond-tipped drill bits for porcelain. Use carbide-tipped bits only as a last resort for very occasional, small holes in less dense porcelain, and proceed with extreme caution. Masonry bits, while designed for hard materials like concrete, are generally not suitable for porcelain tile due to its brittle nature and glazed surface, and will likely cause chipping or cracking.
Essential Drilling Techniques for Porcelain Tile
Having the right drill bit is only half the battle. Proper technique is crucial to prevent cracking, chipping, and overheating.
- Preparation is Key:
- Clean the Tile: Ensure the tile surface is clean and free of debris.
- Mark the Spot: Precisely mark the drilling location with a water-soluble pencil or marker.
- Apply Masking Tape: Place a strip of masking tape over the drilling spot. This provides a surface for the drill bit to grip, preventing it from “walking” or slipping on the smooth tile surface. It also helps to minimize chipping around the hole.
- Choose the Right Drill: Use a standard rotary drill (corded or cordless) with variable speed control. NEVER use a hammer drill or the hammer function on a combi drill for drilling porcelain tile. The hammering action will almost certainly crack the tile.
- Secure the Tile (if not installed): If drilling a loose tile, place it on a stable, flat surface (like a piece of plywood or sturdy scrap wood) to provide support and absorb vibrations.
- Starting the Hole:
- Angle Start (for Diamond Bits without Guide): If you don’t have a drilling guide, start the drill bit at a slight angle to the tile surface. This allows the diamond tip to create a small notch. Once a groove is established, slowly bring the drill perpendicular to the tile.
- Use a Drill Guide/Jig: For ultimate precision and to prevent bit wandering, especially with larger holes, use a suction-cup drill guide or create a homemade template from a piece of wood. This holds the drill bit firmly in place as you start.
- Drilling and Cooling:
- Slow Speed to Start: Begin drilling at a very slow speed with light pressure. This is crucial for creating an initial indentation and preventing the bit from slipping.
- Gradual Increase in Speed (but not too fast): Once the bit has engaged the tile and a groove is formed, you can gradually increase the drill speed. However, avoid going full speed. A medium to high speed (typically 1000-2000 RPM, but check manufacturer guidelines) is generally appropriate, but never full power. Let the drill bit do the work.
- Consistent, Gentle Pressure: Apply consistent, light pressure. Do not force the drill. Excessive pressure generates heat and can crack the tile.
- Crucial Cooling: This is perhaps the most critical step. Heat is the enemy of both the drill bit and the tile.
- For Wet Diamond Bits: Maintain a continuous flow of water onto the drilling area. This can be done with a spray bottle, a damp sponge, or a dedicated water-feed system.
- For Dry Diamond Bits (wax-filled): The internal wax provides initial cooling. If drilling multiple holes or if the wax depletes, periodically dip the drill bit into cold water to cool it down.
- For Carbide-Tipped Bits: Constant water cooling is absolutely essential.
- “Pecking” Motion (optional but helpful): For larger holes or thick tiles, consider a “pecking” motion – drilling for a few seconds, lifting the bit slightly to allow dust and heat to escape, then continuing.
- Orbital/Wobble Motion (for some dry diamond bits): Some dry diamond drill bits are designed to be used with a slight orbital or wobbling motion. This helps clear debris and allows for better cooling. Always check the manufacturer’s recommendations.
- Breaking Through and Finishing:
- Stop When Through: As soon as the drill bit breaks through the porcelain tile, stop drilling with that bit. Continuing to drill into the substrate (the wall behind the tile) with a tile-specific bit will dull it quickly.
- Change Bits for Substrate: If you need to drill further into the substrate (e.g., for a wall anchor), switch to an appropriate drill bit for that material (e.g., a masonry bit for concrete or brick, or a standard twist bit for wood/drywall).
- Clean Up: Once the hole is drilled, clean up any dust and debris. You can use a fine-grit sandpaper or a diamond honing pad to smooth any rough edges around the hole if desired.
Safety Precautions When Drilling Porcelain Tile
Safety should always be your top priority when working with power tools and hard materials like porcelain tile.
- Eye Protection: Always wear safety glasses or goggles to protect your eyes from flying tile chips and dust.
- Dust Mask: Drilling porcelain tile can release fine silica dust, which can be harmful if inhaled over time. Wear a dust mask or respirator, especially in enclosed spaces.
- Gloves: Work gloves can protect your hands from sharp tile edges and provide a better grip on the drill.
- Ventilation: Work in a well-ventilated area to minimize dust inhalation.
- Check for Utilities: Before drilling, use a stud finder or a utility scanner to check for hidden electrical wires, water pipes, or gas lines behind the wall. Drilling into these can cause serious injury or damage.
- Secure Workspace: Ensure your workspace is stable and free of clutter. If drilling loose tiles, secure them properly.
- Unplug When Changing Bits: Always unplug your drill or remove the battery before changing drill bits.
- No Hammer Function: Reiterate: Never use the hammer function on your drill when working with porcelain tile.
- Water Safety: If using wet drilling methods, be mindful of electrical safety. Ensure your drill is plugged into a GFCI (Ground Fault Circuit Interrupter) outlet and avoid direct contact between water and electrical components.
Maintaining Your Drill Bits
Proper maintenance will extend the life of your expensive drill bits:
- Clean After Use: Wipe down your drill bits after each use to remove any tile dust or debris.
- Store Properly: Store drill bits in their protective cases or a drill bit organizer to prevent damage to the delicate tips.
- Inspect Before Use: Before starting a project, inspect your drill bits for any signs of wear, chipping, or dullness. A worn bit will not perform effectively and can damage your tile.
FAQ Section
1. What is the best type of drill bit for porcelain tile?
The best drill bit for porcelain tile is a diamond-tipped drill bit or diamond core hole saw. Regular masonry or carbide bits wear out quickly and can crack the tile.
2. Can I use a regular drill for porcelain tile?
Yes, you can use a regular drill (corded or cordless), but turn off the hammer/drill function. Use a slow speed and apply light, steady pressure to avoid cracking the tile.
3. How do I prevent the drill bit from slipping on porcelain tile?
Apply painter’s tape over the drilling spot to help grip the bit and prevent slipping. You can also use a drill guide or start at a 45° angle until the bit bites.
4. Should I drill porcelain tile wet or dry?
Always drill wet. Use a spray bottle or a trickle of water to keep the bit and tile cool. Drilling dry can overheat the bit and cause cracks or breakage.
5. Can I use a carbide drill bit on porcelain tile?
Carbide bits are okay for soft ceramic tile, but they will dull quickly on porcelain, which is much harder. For porcelain, diamond-tipped bits are highly recommended.
6. How long will a diamond drill bit last on porcelain tile?
A good-quality diamond drill bit can last dozens of holes in porcelain tile if you drill slowly, use water for cooling, and avoid excessive pressure.
7. What drill speed should I use when drilling porcelain tile?
Use a low to medium drill speed (around 500–1000 RPM depending on the bit size). High speed creates too much heat and can damage both tile and bit.
Conclusion
Drilling into porcelain tile doesn’t have to be a daunting task. By understanding the unique properties of this material and equipping yourself with the best drill bit for porcelain tile – which is overwhelmingly a high-quality, diamond-tipped bit (either wet or dry) – you can achieve clean, precise holes without damaging your expensive tiles. Coupled with careful preparation, the right drilling techniques (slow start, gentle pressure, and crucial cooling), and essential safety precautions, your tile installation or renovation project will be a smooth and successful endeavor. Investing in the right tools and mastering the proper methods will save you time, money, and frustration, ensuring a professional finish every time.
Related Articles from DrillAce
Explore top-performing drill drivers for every DIY and pro need. Best Drill Pumps Compared
Discover efficient water transfer tools powered by your drill. Best Magnetic Drill Press
Heavy-duty magnetic drills reviewed for steel fabrication tasks. Carbide Bits for Hardened Steel
Cut tough metal with precision using the best carbide drill bits. Are Drill Brushes Magnetic?
Uncover the materials and magnetic properties of drill brushes. Are Drill Bits Magnetic?
Learn whether drill bits can hold onto screws using magnetism.